Your trade show booth has a few seconds to pull someone in from the aisle. At that distance, your graphics do most of the heavy lifting. The images, colors, and messaging printed on your backwall, banner stands, and hanging signs are what stop foot traffic and communicate who you are before anyone reads a line of text.
At Xibit Solutions, we’ve been producing graphics in our own facility for 20+ years, and we’ve seen firsthand how the right combination of printing method, material, and design turns a forgettable booth into one that wins attention (and awards). This guide covers the full picture: printing technologies, substrates, artwork preparation, design best practices, and logistics. Whether you’re working with us or handling graphics on your own, everything here applies.
Why Trade Show Graphics Deserve Serious Attention
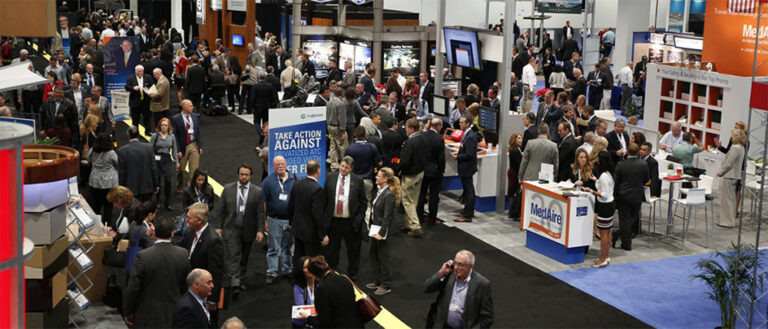
Trade shows put you in front of a concentrated audience of decision-makers. Research from the Center for Exhibition Industry Research (via TSNN) found that 46% of attendees are executives or upper management and 81% have buying authority. Another standout number: 92% of attendees say their top reason for attending is to see new products.
About 45% of attendees visit only one show per year, so you may get a single chance to make an impression on a given prospect. Your graphics are the first thing those prospects evaluate when deciding whether to walk into your booth or keep moving. Weak visuals don’t just look bad. They cost you meetings.
Large-format graphics also serve a practical branding function. On a crowded show floor with hundreds of booths, consistent and bold visuals are how attendees locate and remember you. Your signage needs to communicate your brand clearly from 20 or 30 feet away and still hold up when someone is standing right in front of it.
What Is Large-Format Printing?
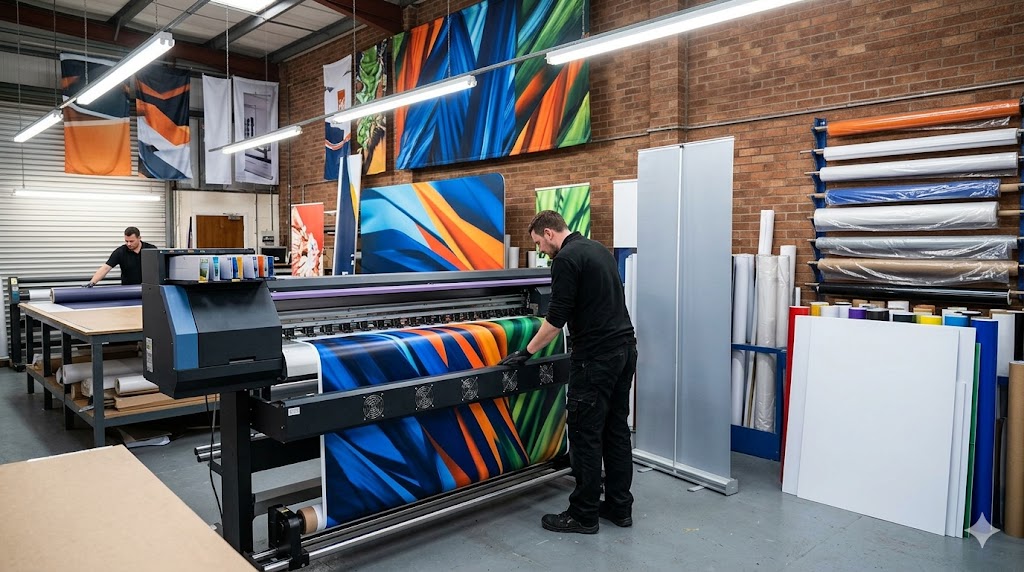
Large-format printing (sometimes called wide-format printing) produces prints significantly larger than standard office output. By industry definition, large-format covers prints 18 to 100 inches wide. Anything beyond roughly 100 inches falls into “grand format” or “super wide format” territory.
In a trade show context, large-format printing is used for booth backwalls, hanging banners, retractable banner stands, table throws, and signage panels. The global large-format printing market was valued at approximately $8.1 billion in 2023 and is projected to exceed $10.4 billion by 2028, driven by demand for bold visual marketing at events, retail environments, and outdoor advertising.
One key difference from standard printing: artwork is prepared at lower resolution (typically 100 to 150 DPI at final size) because these prints are viewed from several feet away. This keeps file sizes manageable without sacrificing visual quality.
Large-Format Printing Technologies Compared
Several printing methods are used for trade show graphics. Each has different strengths depending on the material, environment, and budget. Here’s how they compare:
| Technology | How It Works | Best Substrates | Strengths | Considerations |
| UV-Cured | UV light cures ink instantly on contact | Vinyl, acrylic, foam board, wood, metal | Instant-dry, vibrant color, excellent durability | Higher equipment cost |
| Latex | Water-based ink, heat-cured | Vinyl, canvas, banners, fabric | Flexible, weather-resistant, low odor | Requires heat curing step |
| Dye-Sublimation | Heat transfers dye directly into fabric | Polyester fabrics (flags, backdrops) | Vivid color, wrinkle-resistant, no ink layer on surface | Limited to polyester |
| Solvent/Eco-Solvent | Solvent-based pigment bonds with substrate | Vinyl banners, adhesive films | Bold color, waterproof, abrasion-resistant | Traditional solvent has strong odor |
| Aqueous | Water-based ink | Canvas, coated photo paper | Photo-quality output, safe handling | Requires lamination for durability |
Which Technology Fits Which Application
For large booth backdrops and exterior banners, UV-cured and latex printing are the most common choices because of their durability and color vibrancy under bright convention center lighting.
Dye-sublimation is the go-to for tension fabric displays and fabric pop-ups. The dye infuses directly into the polyester, so there’s no visible ink layer sitting on top of the cloth. The result is a smooth, high-end look that resists wrinkles and washes well for reuse.
Solvent and eco-solvent inks work well for vinyl banner material and adhesive graphics that need to hold up outdoors. Aqueous printing produces beautiful photo-quality results but is better suited for framed indoor pieces or gallery-style displays than for the wear and tear of a trade show floor.
Substrates and Materials for Trade Show Graphics
The material you print on matters as much as the printing method. Weight affects shipping costs (and drayage fees at the venue), durability determines whether you can reuse graphics across multiple shows, and finish affects how your booth looks under venue lighting.
| Material | Weight | Durability | Best Use | Reusable? |
| Vinyl (PVC) | Moderate | High, weather-resistant | Indoor/outdoor banners, retractable stands | Yes |
| Polyester Fabric | Light | Good, washable | Tension fabric displays, pop-up walls, flags | Yes |
| Foam Core | Very light | Low, dents easily | Temporary indoor signs, point-of-purchase | No |
| Rigid PVC (Sintra) | Moderate-heavy | High, weatherproof | Durable indoor/outdoor panels, menu boards | Yes |
| Aluminum Composite (Dibond) | Heavy | Very high | High-end signage, permanent displays | Yes |
| Acrylic (Plexiglass) | Heavy | High | Backlit displays, premium signage | Yes |
| Corrugated Plastic (Coroplast) | Very light | Moderate | Temporary outdoor signs, floor decals | Limited |
For most trade show applications, vinyl and polyester fabric handle the bulk of the work. Vinyl is the standard for banner stands and hanging banners. Fabric is increasingly popular for tension fabric lightboxes and booth backwalls because it’s lightweight (which reduces shipping weight and drayage costs), machine-washable, and wrinkle-resistant when stretched over a frame.
Rigid substrates like Dibond and acrylic are reserved for situations where you need a permanent, high-end look or backlighting capability. They’re heavier and more expensive, so they make sense for elements you’ll keep for years rather than swap out every show.
One practical note on drayage: material handling fees at convention centers have increased significantly over the years. Choosing lightweight substrates like fabric and corrugated plastic over rigid panels can meaningfully reduce your on-site costs.
How to Prepare Artwork for Large-Format Prints
Poorly prepared files are the most common cause of disappointing print results. Follow these specifications to make sure your graphics come out sharp:
- Resolution: 100 to 150 DPI at final print size. This is lower than standard print (300 DPI) because large-format graphics are viewed from a distance.
- Scale: Design at 100% of the final print dimensions. If your backwall is 10 feet wide and 8 feet tall, your file should be sized accordingly.
- Bleed: Include at least 0.25 inches of bleed on all sides beyond the trim edge. This prevents white borders after cutting.
- Color mode: Submit files in CMYK, not RGB. CMYK matches the ink output of large-format printers.
- File format: High-resolution PDF is the most universally accepted format. Adobe Illustrator (.ai) and Photoshop (.psd) files also work. Outline all fonts and embed images.
- Image quality check: Stock photos and web-sourced images often don’t have enough resolution for large prints. Always proof a section at 100% before committing to a full print run.
If you’re working with a booth builder who handles graphics production in-house (as we do at Xibit Solutions), your design team can collaborate directly with the print team. That means faster feedback on file issues and fewer surprises when the final product comes off the press.
Trade Show Graphic Design Best Practices
A well-printed graphic on premium material still falls flat if the design doesn’t work for the trade show environment. Here’s what we’ve learned produces results on the show floor:
Lead with Bold Branding
Your company name, logo, and brand colors need to be visible from across the aisle. Use high-contrast colors and large typography. If an attendee can’t identify who you are from 20 feet away, your graphics aren’t doing their job.
Keep Text Minimal
Nobody reads paragraphs at a trade show. Limit copy to a short headline, one supporting statement, and a call-to-action. A few power words or a single compelling statistic will always outperform a block of text.
Structure Your Message in Layers
Think of your signage as having three layers:
- From a distance (20+ feet): Company name and logo
- Mid-range (10 to 15 feet): A headline or key value proposition
- Up close (within the booth): Supporting details, product info, QR codes
Stay Consistent Across Every Element
Your backwall, banner stands, table throw, and hanging sign should all feel like they belong together. Use the same fonts, color palette, and design language across everything. As one industry guide puts it, your booth and signage should feel like one seamless environment. This consistency is what makes a booth look polished rather than pieced together.
For trade show booth ideas that show what this looks like in practice, we keep an updated gallery of booth designs across different industries and sizes.
Plan for Venue Lighting
Convention center lighting is typically fluorescent or LED overhead lighting that can wash out certain colors. Spot-lighting key graphics or using backlit fabric displays can dramatically improve visibility. If your graphics include subtle color gradients, test how they look under bright, neutral-temperature light.
Include a Call-to-Action
Every graphic should prompt the viewer to do something: scan a QR code, visit a product demo station, or pick up a sample. Don’t leave it to chance. Tell people what to do next.
Common Types of Trade Show Graphics
Most trade show booths use a combination of these graphic elements:
- Backwall graphics: The primary visual behind your booth. Can be printed fabric stretched over a frame, rigid panels, or a combination. This is the single highest-impact graphic in your exhibit.
- Retractable banner stands: Portable, self-contained units with graphics that roll up for transport. Useful for flanking a booth or highlighting specific products.
- Hanging signs: Overhead structures suspended from the venue ceiling. Visible from across the show floor. Common in island booth configurations where you have 360-degree visibility.
- Table throws and counter wraps: Branded fabric covers for tables and counters. Often overlooked, but they complete the visual and eliminate the “folding table” look.
- Floor graphics: Adhesive prints applied to the booth floor. Can guide foot traffic or add branding to otherwise unused space.
- Modular graphic panels: Interchangeable printed panels that snap into modular display systems. Useful if you attend multiple shows and want to swap messaging without replacing the entire display.
The right mix depends on your booth size, layout, and goals. A 10’x10′ linear booth might only need a backwall and one banner stand. A 20’x20′ island booth could include a hanging sign, multiple backwalls, counter graphics, and interactive elements.
Logistics: Ordering, Shipping, and On-Site Setup
Printing Lead Times
Order graphics at least two to four weeks before your show to allow time for proofing, revisions, and production. Custom or specialty prints may need more time. If you’re working with a company that handles fabrication and graphics under one roof, timelines tend to be shorter because there’s no back-and-forth with a third-party printer.
Shipping and Drayage
Weight matters. Heavy rigid panels cost significantly more to ship and incur higher drayage fees at the convention center. Whenever possible, choose lightweight substrates (fabric over rigid panels, corrugated plastic over aluminum composite).
Pack graphics in padded cases or crates and label them clearly. Rolled fabric and vinyl should be shipped in hard tubes, not folded. Fold lines in vinyl or fabric are difficult to remove and will show under venue lighting.
On-Site Preparation
Allow time during setup for:
- Steaming or stretching fabric to remove any shipping wrinkles
- Cleaning acrylic or glossy panels (fingerprints and dust show up under bright lights)
- Positioning lighting to highlight key graphics
- Testing any digital elements (screens, QR codes) that tie into your printed signage
Having an experienced installation team handle setup makes a noticeable difference. Graphics that are properly tensioned, aligned, and lit look professional. Graphics that are slightly crooked, rippled, or poorly lit undermine everything else.
Frequently Asked Questions
What resolution should trade show graphics be?
Design files at 100 to 150 DPI at full print size. Because these prints are viewed from several feet away, this resolution produces sharp results without creating unmanageably large files.
What’s the difference between dye-sublimation and UV printing?
Dye-sublimation transfers dye directly into polyester fabric using heat, producing a smooth finish with no visible ink layer. UV-cured printing uses ultraviolet light to instantly cure ink on rigid or flexible substrates like vinyl, acrylic, or foam board. Dye-sub is best for fabric displays; UV is best for rigid signs and panels.
Can I reuse trade show graphics across multiple shows?
Yes, if you choose durable materials. Polyester fabric displays are washable and reusable across many shows. Vinyl banners hold up well for several uses. Foam core and corrugated plastic are generally single-use or short-term materials.
How far in advance should I order graphics?
Plan for two to four weeks of lead time minimum. Rush orders are sometimes possible, but proofing and revisions take time. The earlier you finalize artwork, the more flexibility you have if changes are needed.
Should I choose fabric or vinyl for my booth backwall?
Fabric (typically polyester printed via dye-sublimation) is lighter, wrinkle-resistant when stretched, and produces a clean matte finish. Vinyl is more durable and cost-effective for standard banner applications. For backwalls and large displays, fabric has become the preferred choice because of its lighter shipping weight and premium appearance.
What file format should I provide to my printer?
High-resolution PDF is the safest choice. Native Adobe Illustrator or Photoshop files also work. Make sure fonts are outlined, images are embedded, and the file is set to CMYK color mode with at least 0.25 inches of bleed.
Get Your Trade Show Graphics Right the First Time
Getting graphics wrong is expensive and stressful, especially when you’re days away from a show. If you want to skip the guesswork, our team at Xibit Solutions handles everything from design through printing in our North Las Vegas production facility. One team, one point of contact, and graphics that are built to match your booth perfectly.
Contact us to talk through your next show, or call (702) 361-7502 for a free consultation and estimate.